
yii2 用gii生成CRUD页面
综述:
yii2的gii工具真的是神器啊,之前对他了解太少,只知道用来生成model。竟然还可以直接生成一个增删改查的几个页面,是在太酷。
对于这个工具,先从基本的开始讲吧。
1. gii生成model
这个是最基本的吧,直接生成。里面几个方法比较重要。
1.1 rules方法
这个方法可以通过调用validate这个方法,然后验证你想要验证的字段。
[["content"], "string"],//设置为string类型
[["cat_id", "user_id"], "integer"],// 设置为int类型
["title", "summary"], "string", "max" => 255] //设置为string类型,最大长度255
[["user_id", "content"], "required"],// 必填字段
["rememberMe", "boolean"],//布尔类型
["password", "validatePassword"], // password is validated by validatePassword()
[["post_id", "tag_id"], "unique", "targetAttribute" => ["post_id", "tag_id"], "message" => "The combination of Post ID and Tag ID has already been taken."] //唯一性判断,然后错误提示写在message当中,可以用中英文翻译  targetAttribute填写的是目标标签
[["tag_name"], "unique"] //也可以简单的这么写

const STATUS_ACTIVE = 10;
const STATUS_DELETED = 0;
["status", "default", "value" => self::STATUS_ACTIVE],//设置默认值
["status", "in", "range" => [self::STATUS_ACTIVE, self::STATUS_DELETED]],//in表示在range这个数组内
当然,gii生成完model之后,model其实有两种,一种是普通的model,一种是用于表单的model。用于表单的model的例子
<?php
namespace commonmodels;

use Yii;
use yiiaseModel;

/**
 * Login form
 */
class LoginForm extends Model
{
    public $username;
    public $password;
    public $rememberMe = true;

    private $_user;


    /**
     * @inheritdoc
     */
    public function rules()
    {
        return [
            // username and password are both required
            [["username", "password"], "required"],
            // rememberMe must be a boolean value
            ["rememberMe", "boolean"],
            // password is validated by validatePassword()
            ["password", "validatePassword"],
        ];
    }

    /**
     * Validates the password.
     * This method serves as the inline validation for password.
     *
     * @param string $attribute the attribute currently being validated
     * @param array $params the additional name-value pairs given in the rule
     */
    public function validatePassword($attribute, $params)
    {
        if (!$this->hasErrors()) {
            $user = $this->getUser();
            if (!$user || !$user->validatePassword($this->password)) {
                $this->addError($attribute, "Incorrect username or password.");
            }
        }
    }

    /**
     * Logs in a user using the provided username and password.
     *
     * @return boolean whether the user is logged in successfully
     */
    public function login()
    {
        if ($this->validate()) {
            return Yii::$app->user->login($this->getUser(), $this->rememberMe ? 3600 * 24 * 30 : 0);
        } else {
            return false;
        }
    }

    /**
     * Finds user by [[username]]
     *
     * @return User|null
     */
    protected function getUser()
    {
        if ($this->_user === null) {
            $this->_user = User::findByUsername($this->username);
        }

        return $this->_user;
    }
}
2.gii生成CRUD页面
2.1 CRUD的生成
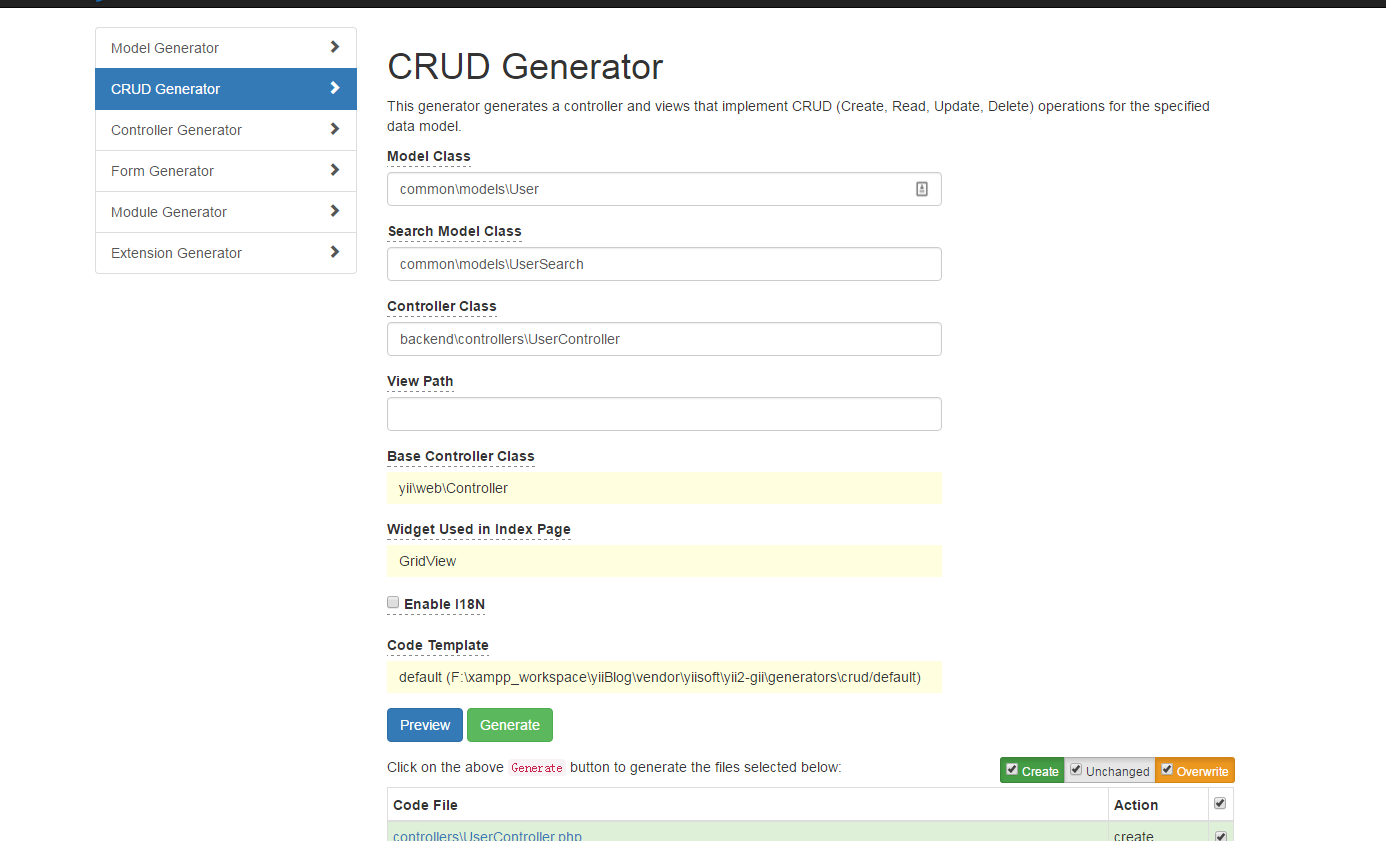
这个页面是生成一个CRUD的基本页面的填写内容。填好后,会生成一个控制器,一个search的model,和六个view视图文件,视图的文件包括详情页,列表页,添加页,修改页等。
要先写的三个字段。
Model Class: 填写model所在地址,需要写model的namespace。
Search Model Class: 这个是填写要生成的search model的名字和地址
Controller Class: 这个就是填写生成的控制器的地址
这三个填写完毕后就能自动生成了。
自动生成的页面效果展示,还有添加按钮,修改和编辑按钮,这一套都能自动生成,省了很多事。
首页:

2.1 关于GridView的使用
这里主要展示他的使用。
控制器
    /**
     * Lists all PostsModel models.
     * @return mixed
     */
    public function actionIndex()
    {
        $searchModel = new PostSearch();
        $dataProvider = $searchModel->search(Yii::$app->request->queryParams);

        return $this->render("index", [
            "searchModel" => $searchModel,
            "dataProvider" => $dataProvider,
        ]);
    }
使用的GridView来展示数据
<?php

use yiihelpersHtml;
use yiigridGridView;

/* @var $this yiiwebView */
/* @var $searchModel commonmodelsUserSearch */
/* @var $dataProvider yiidataActiveDataProvider */

$this->title = "Users";
$this->params["breadcrumbs"][] = $this->title;
?>
<div class="user-index">
    <?= GridView::widget([
        "dataProvider" => $dataProvider,
        "filterModel" => $searchModel,
        "columns" => [
            ["class" => "yiigridSerialColumn"],
            "id",
            "username",
             "email:email",
             "status" => [
                 "label" => "状态",
                 "attribute" => "status",
                 "value" => function($model){
                     return ($model->status == 10)? "激活":"非激活";
                 },
                 "filter" => [
                   "0" => "非激活",
                   "10" => "激活",
                 ],//搜索过滤
             ],
             "created_at",

             //下面三个是其他的控制器里拿过来的 为的是展示gridview的几个用法
             "cat.cat_name",//这个是post表和cat有内联关系,然后用.就可以访问了
             "created_at:datetime",
             "title" =>[
                "attribute" => "title", //属性
                "format" => "raw",//表示不对内容进行处理,即html标签也要自动转化
                "value" => function($model){
                    //添加A标签 加上http://frontend.blog.com 这个就能跳转到前台了
                    return "<a href="http://frontend.blog.com" . Url::to(["post/view", "id"=>$model->id]) . "">" . $model->title . "</a>";
                }
            ],
             ],
            ["class" => "yiigridActionColumn"],
        ],
    ]); ?>

</div>
关于gridview使用的几个点,
1.可以用数据库的字段直接写上去,这样就会展示对应的字段了。
如
"created_at",2.可以指定几个类型,这个的话要网上找了,我这里显示两个。
"created_at:datetime",
"email:email",
3.可以自己指定方法来展示,如那些原来是0,1的字段的,通过方法转化下显示,或者添加a标签之类的
"title" =>[
                "attribute" => "title", //属性
                "format" => "raw",//表示不对内容进行处理,即html标签也要自动转化
                "value" => function($model){
                    //添加A标签 加上http://frontend.blog.com 这个就能跳转到前台了
                    return "<a href="http://frontend.blog.com" . Url::to(["post/view", "id"=>$model->id]) . "">" . $model->title . "</a>";
                }
            ],
4.展示内联关系,就是查询其他表的相关字段来展示,这个还需要在对应的model里面加上对应的get这个关联表。
 "cat.cat_name",//这个是post表和cat有内联关系,然后用.就可以访问了


    //PostsModel里面的方法
    public function getCat(){
        return $this->hasOne(CatsModel::className(), ["id" => "cat_id"]);
}- 上一篇: yii2的用户登录hash及其验证分析
- 下一篇: yii IUserIdentity验证类的使用
