一:简单介绍
这是新浪微博的iOS端项目,来自于黑马的一个实战项目。(本人没有培训,纯属自学,但人要学会感恩,虽然是自己买的学习资料,但是饮水思源!!)
主要分成五大模块,本次全部运用纯代码实现,其中会用到很多前面学过得内容,如果有的地方有重复的知识点,说明这个知识点真的很重要,没有时间看视频学习或者培训的朋友们,可以看猫猫的这一系列博客,猫猫会竭尽所能的完善他。
有什么不全面的地方,欢迎大家回复我,猫猫会尽快改正的。
二:建立项目导入素材
第一步首先我们要建立我们的项目了,在这儿我并没有用最新版的xcode6,而是用的xcode5.1,为什么用的5.1而不是6呢?
首先:我所学习的视频是用的xcode5.1,这是最主要的原因,猫猫作为一个体育生,自学编程两年所得到的经验就是,在看视频自学的时候尽可能让自己的一切与别人实体教学一样,猫猫曾经在学android时候就因为android 的sdk不一样,新出的碎片化跟视频中的操作不一样而大大打击学习的积极性。
其次:企业还有很多再用5.1甚至是4.1(据朋友说。。。)当然,这个也可以看出主要原因啦。不过猫猫建议,在学到一定水平的时候,多接收下新的知识,当然我觉得旧的更重要,不说咱国语有云,温故知新,万变不离其宗,学扎实旧的知识,新的知识上手搜easy。
建立项目
选择Single View Application 选择下一步 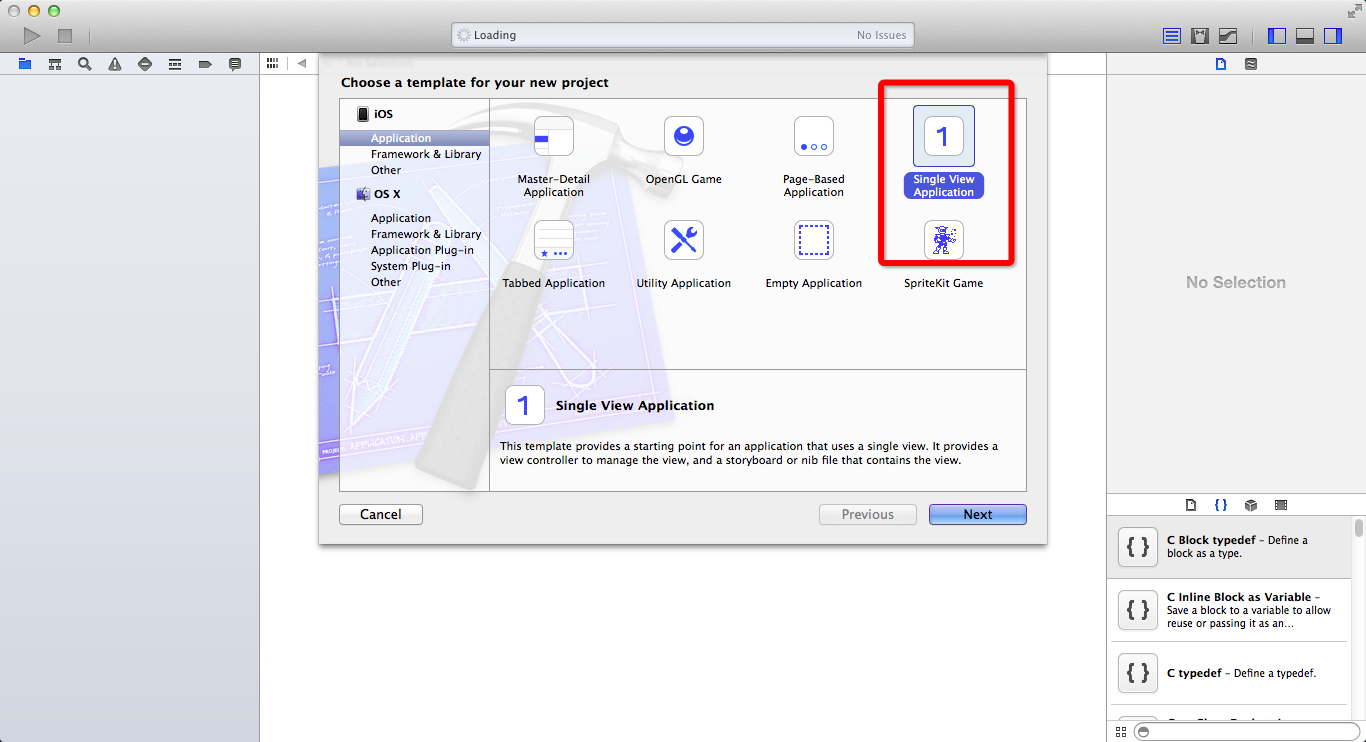
写入项目名称猫猫微博(名字随便) 选择下一步 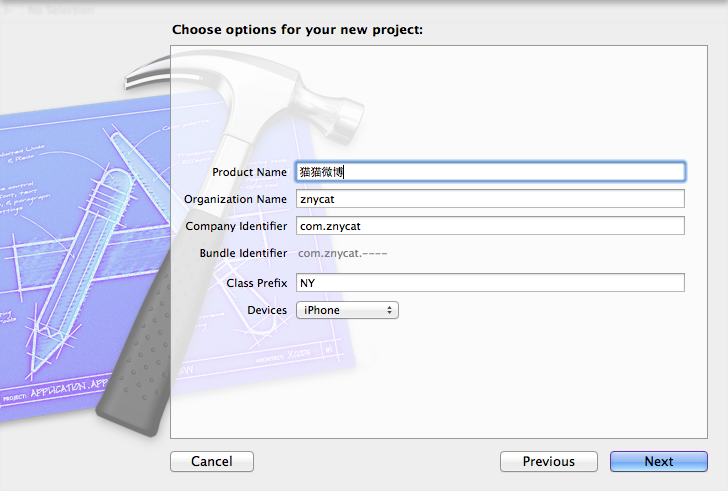
然后就是下一步下一步了
因为我们要用纯代码,所以先删除其他没用的Controller还有Main.storyboard 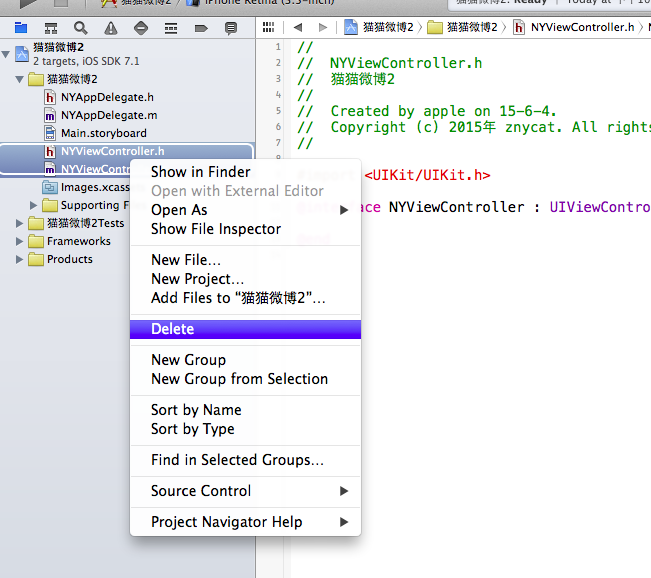
Remove References 表示只是在xcode中删除,但是在文件中还有。
Move To Trash 就代表,直接进入了系统废纸篓了 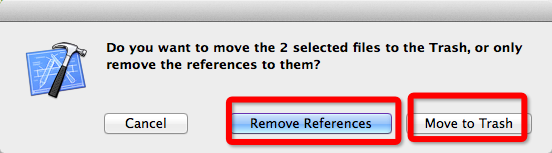
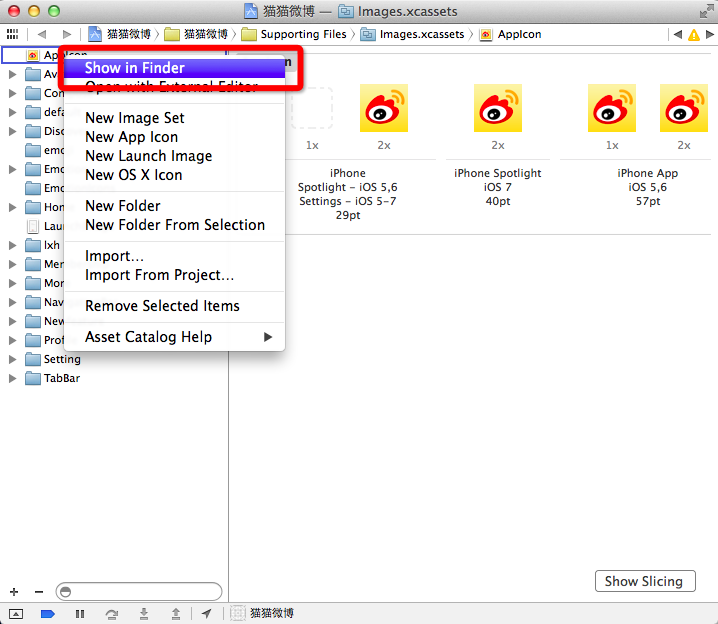
然后导入素材(我们用到的图片) images.xcassets 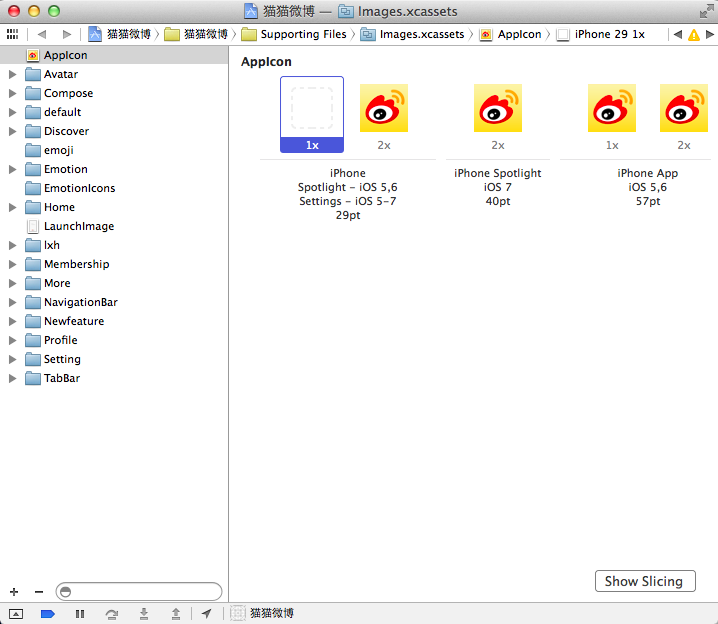
applcon里面的是在手机首页的那个图
launchimage是指得应用加载时候开始的那个图片 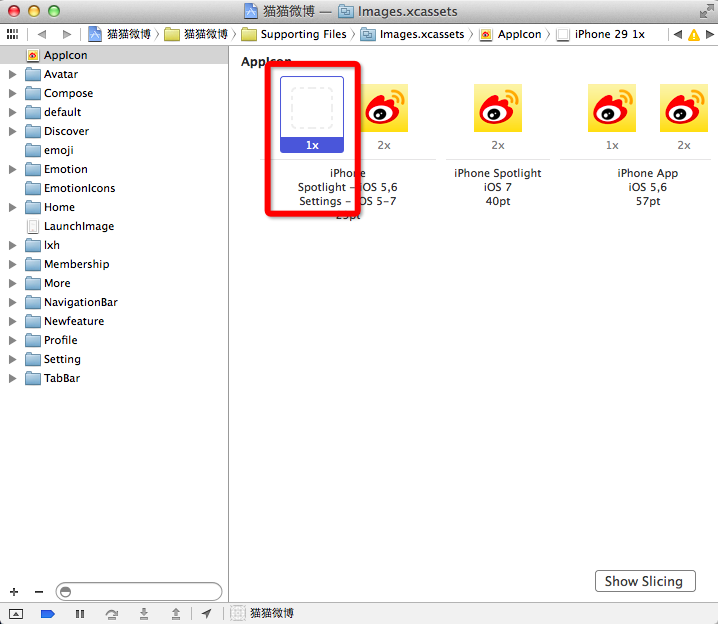
对于第一个图片的空白位置,我们可以直接通过修改json文件来控制,当然,直接拖拽进去也可以(相当于修改json) 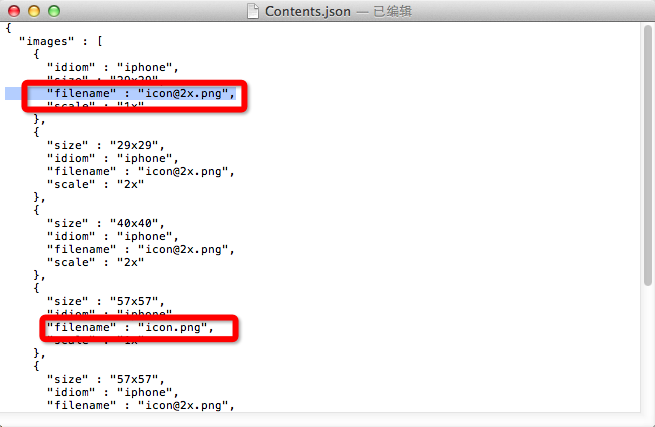
三:创建window
前面有博客写过程序运行时候会经过哪些步骤。
因为我们删除了Main.storyboard,这时候运行程序会报错,我们需要修改图里面的main 删除他,改成空 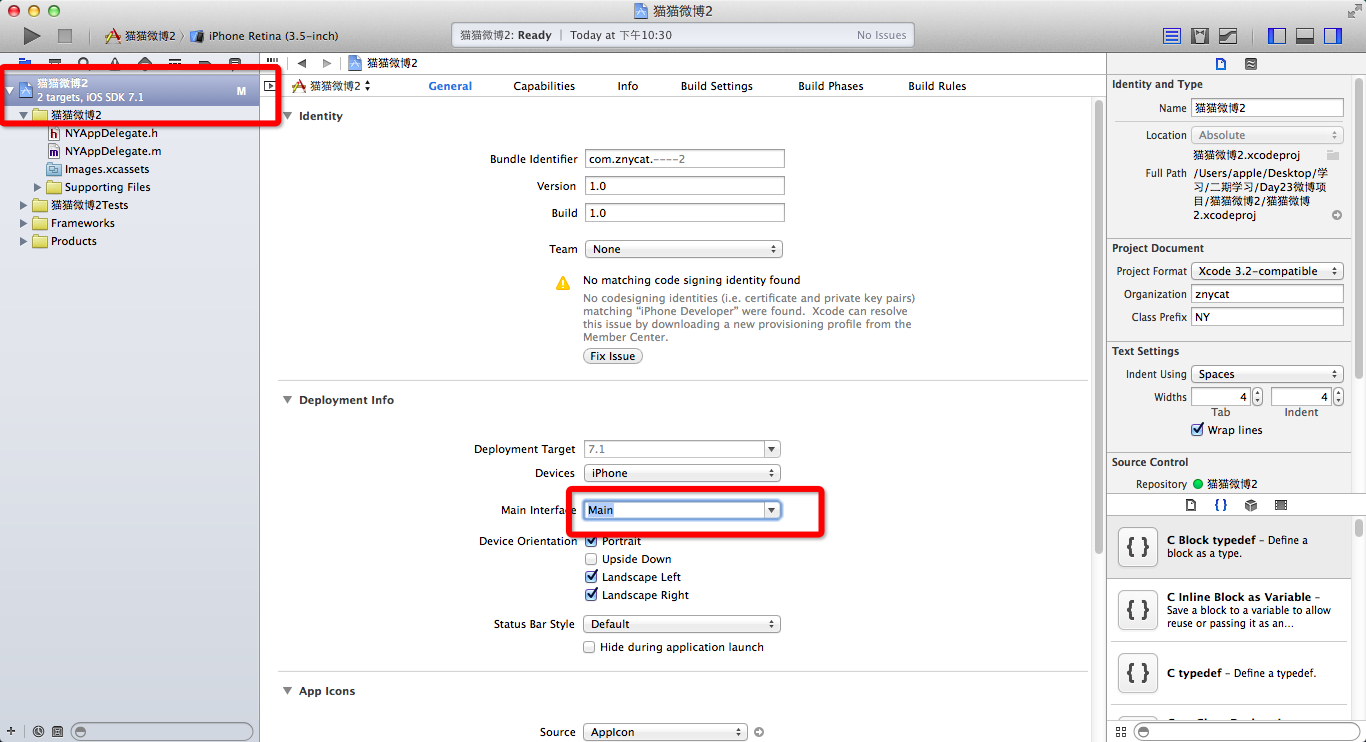
这时候运行程序,将会是这样: 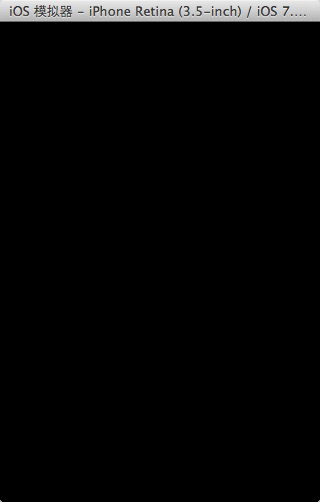
乌七八黑。。。
然后我们要在NYAppDelegate.m来写代码了。
- (BOOL)application:(UIApplication *)application didFinishLaunchingWithOptions:(NSDictionary *)launchOptions
{
    //1.创建窗口
    self.window = [[UIWindow alloc]initWithFrame:[UIScreen mainScreen].bounds];

    //2.设置根控制器
    NYTabBarViewController *tabbarC = [[NYTabBarViewController alloc] init];
    self.window.rootViewController = tabbarC;

    //3.显示窗口
    [self.window makeKeyAndVisible];

    return YES;
}
简单三步,就可以显示了。
自己写NYTabBarViewController.m
//
//  NYTabBarViewController.m
//  猫猫微博
//
//  Created by apple on 15-6-2.
//  Copyright (c) 2015年 znycat. All rights reserved.
//

#import "NYTabBarViewController.h"
#import "NYHomeViewController.h"
#import "NYMessageCenterViewController.h"
#import "NYDiscoverViewController.h"
#import "NYProfileViewController.h"
#import "NYNavigationController.h"

@interface NYTabBarViewController ()

@end

@implementation NYTabBarViewController

-(void)viewDidLoad
{
    [super viewDidLoad];

    // 1.初始化子控制器
    // 1.初始化子控制器
    NYHomeViewController *home = [[NYHomeViewController alloc] init];
    [self addChildVc:home title:@"首页" image:@"tabbar_home" selectedImage:@"tabbar_home_selected"];

    NYMessageCenterViewController *messageCenter = [[NYMessageCenterViewController alloc] init];
    [self addChildVc:messageCenter title:@"消息" image:@"tabbar_message_center" selectedImage:@"tabbar_message_center_selected"];

    NYDiscoverViewController *discover = [[NYDiscoverViewController alloc] init];
    [self addChildVc:discover title:@"发现" image:@"tabbar_discover" selectedImage:@"tabbar_discover_selected"];

    NYProfileViewController *profile = [[NYProfileViewController alloc] init];
    [self addChildVc:profile title:@"我" image:@"tabbar_profile" selectedImage:@"tabbar_profile_selected"];
}

/**
 *  添加一个子控制器
 *
 *  @param childVc       子控制器
 *  @param title         标题
 *  @param image         图片
 *  @param selectedImage 选中的图片
 */
- (void)addChildVc:(UIViewController *)childVc title:(NSString *)title image:(NSString *)image selectedImage:(NSString *)selectedImage
{
    // 设置子控制器的文字
    childVc.title = title; // 同时设置tabbar和navigationBar的文字
    //    childVc.tabBarItem.title = title; // 设置tabbar的文字
    //    childVc.navigationItem.title = title; // 设置navigationBar的文字

    // 设置子控制器的图片
    childVc.tabBarItem.image = [UIImage imageNamed:image];
    childVc.tabBarItem.selectedImage = [[UIImage imageNamed:selectedImage]imageWithRenderingMode:UIImageRenderingModeAlwaysOriginal];

    // 设置文字的样式
    NSMutableDictionary *textAttrs = [NSMutableDictionary dictionary];
    textAttrs[NSForegroundColorAttributeName] = NYColor(123, 123, 123);
    NSMutableDictionary *selectTextAttrs = [NSMutableDictionary dictionary];
    selectTextAttrs[NSForegroundColorAttributeName] = [UIColor orangeColor];
    [childVc.tabBarItem setTitleTextAttributes:textAttrs forState:UIControlStateNormal];
    [childVc.tabBarItem setTitleTextAttributes:selectTextAttrs forState:UIControlStateSelected];

    // 先给外面传进来的小控制器 包装 一个导航控制器
    NYNavigationController *nav = [[NYNavigationController alloc] initWithRootViewController:childVc];
    // 添加为子控制器
    [self addChildViewController:nav];
}

/*
#pragma mark - Navigation

// In a storyboard-based application, you will often want to do a little preparation before navigation
- (void)prepareForSegue:(UIStoryboardSegue *)segue sender:(id)sender
{
    // Get the new view controller using [segue destinationViewController].
    // Pass the selected object to the new view controller.
}
*/

@end
这里用到了面向对象的思路来设计代码,我们需要一个NYTabBarViewController,要创建他,谁最清楚呢?当然是他自己了,所以我们就把代码放到他自己里面。做好代码的重构。
而对于
“NYHomeViewController.h”
“NYMessageCenterViewController.h”
“NYDiscoverViewController.h”
“NYProfileViewController.h”
“NYNavigationController.h”
这些,大家先把他看做是tableViewController或者ViewController就可以了,就是一个个的类,还没有实现功能。
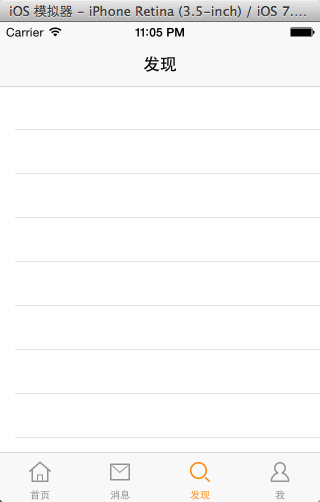
效果就是这样: