14.1гҖҖж•°жҚ®еә“иҝҒ移
иҝҷдёӘеҗҚеӯ—жҳҜжәҗиҮӘдәҺRuby On RailsеңЁйӮЈж—¶еҖҷзҡ„еҚ°иұЎпјҢдёҚзӣҙжҺҘдҪҝз”ЁMySQLзҡ„зӣ®зҡ„еңЁдәҺи®©жҲ‘们еҸҜд»Ҙдё“жіЁдәҺиҝҮзЁӢгҖӮ
14.1.1гҖҖеҲӣе»әиЎЁ
иЎЁзҡ„жҰӮеҝөпјҢзұ»дјјдәҺеңЁExcelдёӯзҡ„иЎЁпјҢеҰӮжһңдҪ зңҹе®һдёҚжҮӮж•°жҚ®еә“гҖӮ и®©жҲ‘们еҲӣе»әдёҖдёӘathomesзҡ„иЎЁпјҢдёәд»Җд№ҲжҳҜathomesпјҢеӣ дёәд»ҘеүҚеңЁеҶҷandroidзЁӢеәҸзҡ„ж—¶еҖҷе°ұеҸ«зҡ„жҳҜathomeпјҢеҝҪз•ҘжҺүиҝҷдәӣж¬ЎиҰҒзҡ„еӣ зҙ еҗ§гҖӮ
$ php artisan migrate:make create_athomes_table
жү“ејҖ app/database/migrations/create_athomes_table.php иҝҷйҮҢзҡ„жҳҜз”ұж—Ҙжңҹе’ҢжҹҗдәӣйҡҸжңәеҸҳйҮҸз»„жҲҗзҡ„пјҢдҝ®ж”№з”ҹжҲҗзҡ„PHPд»Јз ҒпјҢеҰӮдёӢ:
use IlluminateDatabaseSchemaBlueprint;
use IlluminateDatabaseMigrationsMigration;

class CreateAthomesTable extends Migration {
    public function up()
    {
        Schema::create("athomes", function(Blueprint $table)
        {
            $table--->increments("id");
            $table->float("temperature");
            $table->float("sensors1");
            $table->float("sensors2");
            $table->boolean("led1");
            $table->timestamps();
        });
    }
    public function down()
    {
        Schema::drop("athomes");
    }
}
idеҖјжҳҜиҮӘеҠ зҡ„пјҢд№ҹе°ұжҳҜжҲ‘们еңЁlocalhost/athome/{id}пјҢеҪ“жҲ‘们еҲӣе»әдёҖдёӘж–°зҡ„ж•°жҚ®зҡ„ж—¶еҖҷпјҢдјҡиҮӘеҠЁеҠ дёҠеҺ»гҖӮжңҖеҗҺдёҖдёӘtimestampsжү№зҡ„жҳҜж—¶й—ҙпјҢдјҡеҢ…еҗ«еҲӣе»әж—¶й—ҙе’Ңдҝ®ж”№ж—¶й—ҙгҖӮ еү©дёӢзҡ„temperature,sensors1,sensors2жҳҜе°Ҹж•°пјҢд»ҘеҸҠеҸӘжңүtrueе’Ңfalseзҡ„led1гҖӮ
14.1.2гҖҖж•°жҚ®еә“иҝҒ移
жҲ‘们еҸӘжҳҜеҶҷдәҶжҲ‘们йңҖиҰҒзҡ„ж•°жҚ®зҡ„ж јејҸиҖҢ并没жңүдёўеҲ°ж•°жҚ®еә“йҮҢпјҢ
$ php artisan migrate
иҝҷдёӘе°ұжҳҜжҲ‘们жү§иЎҢиҝҒ移зҡ„е‘Ҫд»ӨпјҢеҰӮжһңдҪ з”ЁphpmyadminеҸҜд»ҘзӣҙжҺҘжү“ејҖжҹҘзңӢпјҢжІЎжңүзҡ„иҜқпјҢеҸҜд»ҘгҖӮ
$ mysql -uroot -p
use iot;
select * from athomes;
е°ұеҸҜд»ҘзңӢеҲ°жҲ‘们еҶҷзҡ„дёңиҘҝпјҢйӮЈд№ҲжҺҘдёӢжқҘе°ұжҳҜеҲӣе»әRESTfulжңҚеҠЎдәҶ
14.2гҖҖеҲӣе»әRESTful
з”ЁдёӢйқўзҡ„д»Јз Ғе®һзҺ°жҲ‘们称д№ӢдёәAthomesжҺ§еҲ¶еҷЁзҡ„еҲӣе»ә
$ php artisan controller:make AthomesController
е°ұдјҡеңЁapp/controllersдёӢйқўз”ҹжҲҗдёӢйқўзҡ„д»Јз Ғ
class AthomesController extends BaseController {
    public function index() {}
    public function create()  {}
    public function store() {}
    public function show($id) {}
    public function edit($id) {}
    public function update($id) {}
    public function destroy($id) {}
}
14.3гҖҖLaravel Resources
дёҠйқўзҡ„д»Јз ҒиҝҮдәҺжІүйҮҚпјҢиҜ·и®©жҲ‘з”Ё Ctrl+C жқҘеёҰжқҘзӮ№зҹҘиҜҶеҗ§гҖӮ
|
Verb
|
Path
|
Action
|
Route Name
GET
|
/resource
|
index
|
resource.index
|
|
GET
|
/resource/create
|
create
|
resource.create
|
|
POST
|
/resource
|
store
|
resource.store
|
|
GET
|
/resource/{resource}
|
show
|
resource.show
|
|
GET
|
/resource/{resource}/edit
|
edit
|
resource.edit
|
|
PUT/PATCH
|
/resource/{resource}
|
update
|
resource.update
|
|
DELETE
|
/resource/{resource}
|
destroy
|
resource.destroy
|
жүҖд»ҘжҲ‘们еҸӘйңҖиҰҒдё“жіЁдәҺеҲӣе»ә create, edit, show, destory зӯүзӯүгҖӮеҘҪеҗ§пјҢдҪ еҸҜиғҪжІЎжңүиҖҗеҝғдәҶпјҢдҪҶжҳҜеңЁдҝ®ж”№иҝҷдёӘд№ӢеүҚжҲ‘们йңҖиҰҒе…ҲеңЁ app/model еҠ дёӘ class
class Athomes extends Eloquent {
    protected $table = "athomes";
}
еҰӮжһңдҪ жғіиҰҒзҡ„еҸӘжҳҜжҺ§еҲ¶еҷЁAthomesзҡ„д»Јз Ғзҡ„иҜқгҖӮгҖӮ
class AthomesController extends BaseController {
    public $restful=true;
    protected $athome;
    public function __construct(Athomes $athome)
    {
        $this--->athome = $athome ;
     }
    public function index()
    {
        $maxid=Athomes::all();
        return Response::json($maxid);
    }
    public function create()
    {
        $maxid=Athomes::max("id");
        return View::make("athome.create")->with("maxid",$maxid);
    }
    public function store()
    {
        $rules = array(
            "led1"=>"required",
            "sensors1" => "required|numeric|Min:-50|Max:80",
            "sensors2" => "required|numeric|Min:-50|Max:80",
            "temperature" => "required|numeric|Min:-50|Max:80"
        );
        $validator = Validator::make(Input::all(), $rules);
        if ($validator->fails()) {
            return Redirect::to("athome/create")
                ->withErrors($validator)
                ->withInput(Input::except("password"));
        } else {
            $nerd = new Athomes;
            $nerd->sensors1       = Input::get("sensors1");
            $nerd->sensors2       = Input::get("sensors2");
            $nerd->temperature    = Input::get("temperature");
            $nerd->led1              = Input::get("led1");
            $nerd->save();
            Session::flash("message", "Successfully created athome!");
            return Redirect::to("athome");
        }
    }
    public function show($id)
    {
        $myid=Athomes::find($id);
        $maxid=Athomes::where("id","=",$id)
                        ->select("id","temperature","sensors1","sensors2","led1")
                        ->get();
        return Response::json($maxid);
    }
    public function edit($id)
    {
        $athome = Athomes::find($id);
        return View::make("athome.edit")
            ->with("athome", $athome);
    }
    public function update($id)
    {
        $rules = array(
            "led1"=>"required|",
            "sensors1" => "required|numeric|Min:-50|Max:80",
            "sensors2" => "required|numeric|Min:-50|Max:80",
            "temperature" => "required|numeric|Min:-50|Max:80"
        );
        $validator = Validator::make(Input::all(), $rules);
        if ($validator->fails()) {
            return Redirect::to("athome/" . $id . "/edit")
                ->withErrors($validator);
        } else {
            $nerd = Athomes::find($id);
            $nerd->sensors1       = Input::get("sensors1");
            $nerd->sensors2       = Input::get("sensors2");
            $nerd->temperature    = Input::get("temperature");
            $nerd->led1              = Input::get("led1");
            $nerd->save();
            Session::flash("message", "Successfully created athome!");
            return Redirect::to("athome");
        }
    }
    public function destroy($id)
    {
        $athome = Athomes::find($id);
        $athome->delete();
        if(is_null($athome))
        {
             return Response::json("Todo not found", 404);
        }
        Session::flash("message", "Successfully deleted the nerd!");
        return Redirect::to("athome");
    }
}
еёҢжңӣдҪ иғҪиҜ»жҮӮпјҢжІЎжңүзҡ„иҜқпјҢ继з»ӯгҖӮ
дёӢйқўиҝҷйғЁеҲҶжқҘиҮӘдәҺд№ӢеүҚзҡ„еҚҡе®ўпјҢиҝҷйҮҢе°ұдёҚеӨҡеҠ и®әиҝ°дәҶгҖӮ иҝҷдёӘд№ҹе°ұжҳҜжҲ‘们иҰҒзҡ„жЁЎжқҝпјҢ
14.3.1гҖҖдҝ®ж”№Create()
public function create()
{
    $maxid=Athomes::max("id");
    return View::make("athome.create")->with("maxid",$maxid);
}
иҝҷйҮҢйңҖиҰҒеңЁapp/views/еҲӣе»әдёҖдёӘathomeйҮҢйқўеҲӣе»әдёҖдёӘcreate.blade.phpпјҢиҮідәҺmaxidпјҢжҡӮж—¶иҝҳдёҚйңҖиҰҒпјҢеҗҺйқўдјҡз”ЁеҲ°showгҖӮеҰӮжһңеҸӘйңҖиҰҒжЁЎжқҝпјҢеҸҜд»Ҙз®ҖеҢ–дёә
public function create()
{
    return View::make("athome.create");
}
иҝҷйҮҢеҸӘжҳҜеҜ№е…¶дёӯд»Јз Ғзҡ„иҝӣиЎҢдёҖдёӢиҜҙжҳҺгҖӮ
14.3.2гҖҖеҲӣе»әеүҚеҸ°йЎөйқў
14.3.2.1 ејҖе§Ӣд№ӢеүҚ
з”ұдәҺдҪҝз”ЁеҲ°дәҶbootstrapд»ҘеҸҠbootstrap-selectпјҢи®°еҫ—ж·»еҠ cssгҖӮ
<link rel="stylesheet" type="text/css" href="<?= url("css/bootstrap.min.css") ?>" />
<link rel="stylesheet" type="text/css" href="<?= url("css/bootstrap-select.min.css") ?>" />
д»ҘеҸҠjavascript
<script type="text/javascript" src="<?= url("js/jquery.min.js")?>"></script>
<script type="text/javascript" src="<?= url("js/bootstrap.min.js") ?>"></script>
<script type="text/javascript" src="<?= url("js/bootstrap-select.min.js") ?>"></script>
<script>
$(".selectpicker").selectpicker();
</script>
14.3.2.2гҖҖеҲӣе»әиө„жәҗйЎөйқў
иҝҷйҮҢз”ЁеҲ°зҡ„жҳҜд№ӢеүҚжҸҗеҲ°зҡ„йӮЈдёӘдҪңиҖ…еҶҷдёӢзҡ„пјҢзЁҚеҫ®дҝ®ж”№дәҶдёҖдёӢгҖӮ
<div class="row-fluid">
{{ HTML::ul($errors->all()) }}
{{ Form::open(array("url" => "athome")) }}
<div class="form-group">
{{ Form::label("led1", "ејҖе…і1") }}
{{ Form::select("led1",array("е…і","ејҖ"),$selected=NULL,array("class"=>"selectpicker")) }}
</div>
<div class="form-group">
{{ Form::label("sensors1", "sensors1") }}
{{ Form::text("sensors1", Input::old("sensors1"), array("class" => "form-control")) }}
</div>
<div class="form-group">
{{ Form::label("sensors2", "sensors2") }}
{{ Form::text("sensors2", Input::old("sensors2"), array("class" => "form-control")) }}
</div>
<div class="form-group">
{{ Form::label("temperature", "temperature") }}
{{ Form::text("temperature", Input::old("temperature"), array("class" => "form-control")) }}
</div>
{{ Form::submit("Create!", array("class" => "btn btn-primary")) }}
{{ Form::close() }}
</div>
ејҖе…ідёҖејҖе§Ӣжү“з®—з”Ё checkboxпјҢеҠ дёҠ bootstrap-switch е®һзҺ°
ON OFF
ејұејұең°и§үеҫ—иҝҳжҳҜжІЎжҺҢжҸЎеҘҪзҡ„иҠӮеҘҸпјҢжүҖд»ҘжңҖеҗҺз”Ё select жқҘе®һзҺ°гҖӮ
иҝҳйңҖиҰҒдҝ®ж”№дёҖдёӢд№ӢеүҚзҡ„ create()пјҢж·»еҠ дёҖиЎҢ
return Redirect::to("athome");
д№ҹе°ұжҳҜж·»еҠ е®ҢеҗҺпјҢйҮҚе®ҡеҗ‘еҲ°йҰ–йЎөжҹҘзңӢпјҢжңҖеҗҺдҫӢеӯҗз»ҷеҮәзҡ„ create еҰӮдёӢ
public function store()
{
    $rules = array(
        "led1"=>"required",
        "sensors1" => "required|numeric|Min:-50|Max:80",
        "sensors2" => "required|numeric|Min:-50|Max:80",
        "temperature" => "required|numeric|Min:-50|Max:80"
    );
    $validator = Validator::make(Input::all(), $rules);
    if ($validator->fails()) {
        return Redirect::to("athome/create")
            ->withErrors($validator);
    } else {
        // store
        $nerd = new Athomes;
        $nerd->sensors1       = Input::get("sensors1");
        $nerd->sensors2       = Input::get("sensors2");
        $nerd->temperature    = Input::get("temperature");
        $nerd->led1            = Input::get("led1");
        $nerd->save();
        Session::flash("message", "Successfully created athome!");
        return Redirect::to("athome");
    }
}
ж•Ҳжһңеӣҫ:

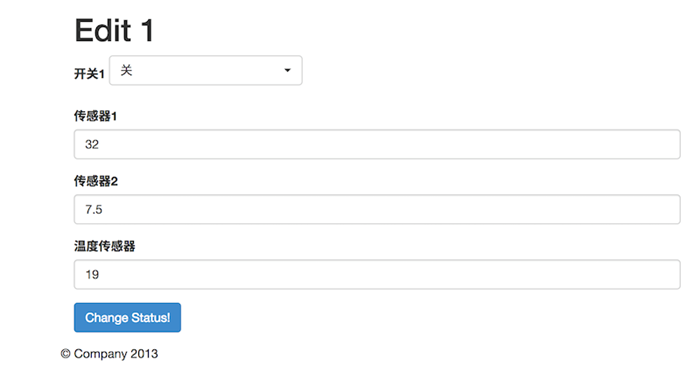
14.3.4гҖҖжӣҙж–°иө„жәҗйЎөйқў
е®Ңж•ҙзҡ„ blade жЁЎжқҝж–Ү件
<!DOCTYPE html lang="zh-cn">
<html>
<head>
<meta http-equiv="Content-type" content="text/html; charset=utf-8">
<meta name="keywords" content="">
<meta name="viewport" content="width=device-width">
<meta name="description" content="">
<title>@yield("title")</title>
<link rel="stylesheet" type="text/css" href="<?= url("css/bootstrap.min.css") ?>" />
<link rel="stylesheet" type="text/css" href="<?= url("css/bootstrap-select.min.css") ?>" />
<link rel="stylesheet" href="<?= url("css/justified-nav.css") ?>" type="text/css" media="screen" />
</head>
<body>
<div class="container">
<div class="container">
<div class="row-fluid">
<h1>Edit {{ $athome->id }}</h1>
<!-- if there are creation errors, they will show here -->
{{ HTML::ul($errors->all()) }}
{{ Form::model($athome, array("route" => array("athome.update", $athome->id), "method" => "PUT")) }}
<div class="form-group">
{{ Form::label("led1", "ејҖе…і1") }}
{{ Form::select("led1",array("е…і","ејҖ"),$selected=NULL,array("class"=>"selectpicker")) }}
</div>
<div class="form-group">
{{ Form::label("sensors1", "дј ж„ҹеҷЁ1") }}
{{ Form::text("sensors1", Input::old("sensors1"), array("class" => "form-control")) }}
</div>
<div class="form-group">
{{ Form::label("sensors2", "дј ж„ҹеҷЁ2") }}
{{ Form::text("sensors2", Input::old("sensors2"), array("class" => "form-control")) }}
</div>
<div class="form-group">
{{ Form::label("temperature", "жё©еәҰдј ж„ҹеҷЁ") }}
{{ Form::text("temperature", Input::old("temperature"), array("class" => "form-control")) }}
</div>
{{ Form::submit("Edit the Nerd!", array("class" => "btn btn-primary")) }}
{{ Form::close() }}
</div>
</div>
<div class="footer">
<p>В© Company 2013</p>
</div>
</div>
</div>
<script type="text/javascript" src="<?= url("js/jquery.min.js")?>"></script>
<script type="text/javascript" src="<?= url("js/bootstrap.min.js") ?>"></script>
<script type="text/javascript" src="<?= url("js/bootstrap-select.min.js") ?>"></script>
<script>
$(".selectpicker").selectpicker();
</script>
<script type="text/javascript" src="<?= url("js/log.js") ?>"></script>
</body>
</html>
ж•Ҳжһңеӣҫ:
жңҖеҗҺж•Ҳжһңи§Ғ:http://b.phodal.com/
- дёҖжӯҘжӯҘжҗӯе»әзү©иҒ”зҪ‘зі»з»ҹ
- еүҚиЁҖ
- 第дёҖйғЁеҲҶ
- 1гҖҖж— еӨ„дёҚеңЁзҡ„HTML
- 2гҖҖж— еӨ„дёҚеңЁзҡ„Javascript
- 3гҖҖж— еӨ„дёҚеңЁзҡ„CSS
- 4гҖҖж— еӨ„дёҚеңЁзҡ„дёүеү‘е®ў
- 5гҖҖGNU/Linux ејәеӨ§дё”Free
- 6гҖҖArduino жһҒе®ўзҡ„зҺ©е…·
- 7гҖҖPython д»Јз ҒеҰӮж•Јж–Ү
- 8гҖҖRaspberry Pi жһҒе®ўзҡ„зӣӣе®ҙ
- 9гҖҖServer дёҖеҲҮзҡҶдёәжңҚеҠЎ
- 10гҖҖWebжңҚеҠЎ
- 11гҖҖHTTP зҶҹжӮү&йҷҢз”ҹ
- 12гҖҖи®ҫи®ЎRESTful API
- 第дәҢйғЁеҲҶ
- 13гҖҖзҺҜеўғеҮҶеӨҮ
- В 14гҖҖеҲӣе»әRESTжңҚеҠЎ
- 15гҖҖRESTдёҺдёҚеҗҢиҜӯиЁҖ
- 16гҖҖеүҚз«ҜжҳҫзӨә
- 17гҖҖRESTfulзҡ„CoAPеҚҸи®®
- 第дёүйғЁеҲҶ
- 18гҖҖз®ҖеҚ•зү©иҒ”зҪ‘
- 19гҖҖAndroidз®ҖеҚ•зӨәдҫӢ
- е°ҫеЈ°