1、Fragment知识概要
Android3.0引入了Fragment,主要目的是用在大屏幕设备上,支持更加动态和灵活的UI设计。Fragment在你的应用中应当是一个模块化和可重用的组件,因为Fragment定义了它自己的布局,以及通过使用它自己的声明周期回调回调方法定义了它自己的行为,可以将Fragment包含到多个Activity中。
(1)Fragment可以作为Activity界面的一部分组成出现;
(2)可以在一个Activity中同时出现多个Fragment,并且一个Fragment也可以在多个Activity中使用;
(3)在Activity运行过程中,可以添加、移除或替换Fragment;
(4)Fragment可以响应自己的输入事件,并且有自己的声明周期,它们的生命周期受宿主Activity的生命周期影响;
(5)Fragment在第一次绘制它的用户界面时,系统会调用onCreateView()方法,此方法返回一个View。(如果不显示UI,返回null);
Fragment两种加载方式:静态加载、动态加载。
2、准备阶段:
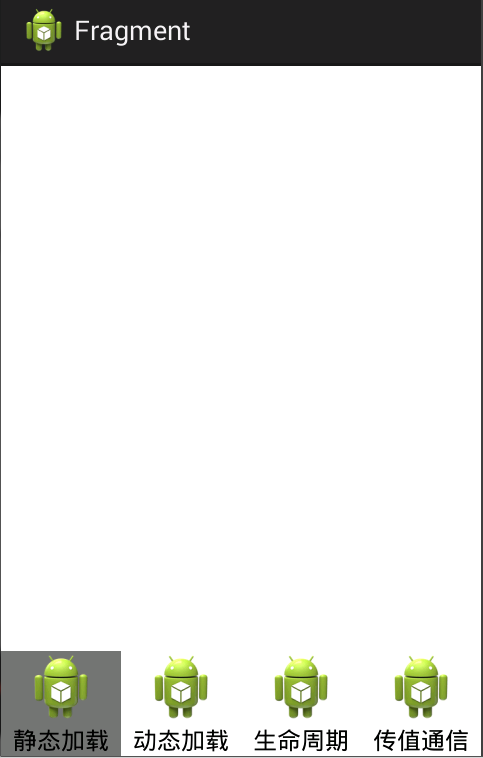
本文以及后续将使用一个APP来讲解关于Fragment的知识,大致布局如下:
values添加color.xml:
<?xml version="1.0" encoding="utf-8"?>
<resources>

    <color name="gray">#88000000</color>
    <color name="white">#ffffff</color>

</resources>
drawable中添加radio_pressed.xml
<?xml version="1.0" encoding="utf-8"?>
<selector xmlns:android="http://schemas.android.com/apk/res/android">

    <item android:drawable="@color/gray" android:state_checked="true"></item>
    <item android:drawable="@color/white" android:state_pressed="true"></item>
    <item android:drawable="@color/white"></item>

</selector>
main主布局:
<?xml version="1.0" encoding="utf-8"?>
<RelativeLayout xmlns:android="http://schemas.android.com/apk/res/android"
    android:layout_width="match_parent"
    android:layout_height="match_parent" >

    <LinearLayout
        android:id="@+id/frame"
        android:layout_width="match_parent"
        android:layout_height="wrap_content"
        android:orientation="vertical" >
    </LinearLayout>

    <RadioGroup
        android:id="@+id/radiogroup"
        android:layout_width="match_parent"
        android:layout_height="wrap_content"
        android:layout_alignParentBottom="true"
        android:gravity="center_horizontal"
        android:orientation="horizontal" >

        <RadioButton
            android:id="@+id/first"
            android:layout_width="0dp"
            android:layout_height="wrap_content"
            android:layout_weight="1"
            android:background="@drawable/radio_pressed"
            android:button="@null"
            android:drawableTop="@drawable/ic_launcher"
            android:gravity="center_horizontal"
            android:text="静态加载" />

        <RadioButton
            android:id="@+id/second"
            android:layout_width="0dp"
            android:layout_height="wrap_content"
            android:layout_weight="1"
            android:background="@drawable/radio_pressed"
            android:button="@null"
            android:drawableTop="@drawable/ic_launcher"
            android:gravity="center_horizontal"
            android:text="动态加载" />

        <RadioButton
            android:id="@+id/thrid"
            android:layout_width="0dp"
            android:layout_height="wrap_content"
            android:layout_weight="1"
            android:background="@drawable/radio_pressed"
            android:button="@null"
            android:drawableTop="@drawable/ic_launcher"
            android:gravity="center_horizontal"
            android:text="生命周期" />

        <RadioButton
            android:id="@+id/fourth"
            android:layout_width="0dp"
            android:layout_height="wrap_content"
            android:layout_weight="1"
            android:background="@drawable/radio_pressed"
            android:button="@null"
            android:drawableTop="@drawable/ic_launcher"
            android:gravity="center_horizontal"
            android:text="传值通信" />
    </RadioGroup>

</RelativeLayout>
MainActivity加载main:
package com.example.fragment;

import android.os.Bundle;
import android.app.Activity;
import android.view.Menu;
import android.widget.RadioGroup;
import android.widget.RadioGroup.OnCheckedChangeListener;

public class MainActivity extends Activity implements OnCheckedChangeListener {

	private RadioGroup group;

	@Override
	protected void onCreate(Bundle savedInstanceState) {
		super.onCreate(savedInstanceState);
		setContentView(R.layout.main);

		group=(RadioGroup) findViewById(R.id.radiogroup);
		group.setOnCheckedChangeListener(this);
	}

	@Override
	public boolean onCreateOptionsMenu(Menu menu) {
		// Inflate the menu; this adds items to the action bar if it is present.
		getMenuInflater().inflate(R.menu.main, menu);
		return true;
	}

	@Override
	public void onCheckedChanged(RadioGroup group, int checkedId) {
		// TODO Auto-generated method stub
		switch (checkedId) {
		case R.id.first:
			//演示静态加载

			break;

		case R.id.second:
			//演示动态加载

			break;

		case R.id.thrid:
			//演示生命周期

			break;

		case R.id.fourth:
			//演示传值通信

			break;
		}
	}

}
3、静态加载
在Activity的layout文件中声明Fragment(特别注意:在标签中的android: name属性中指定了在layout中实例化的Fragment类),标识Fragment的方法:A.android: id 属性提供一个唯一ID;B.android: tag属性提供一个唯一字符串;
添加fragment.xml:
<?xml version="1.0" encoding="utf-8"?>
<LinearLayout xmlns:android="http://schemas.android.com/apk/res/android"
    android:layout_width="match_parent"
    android:layout_height="match_parent"
    android:orientation="vertical" >

	<TextView
	    android:id="@+id/text"
	    android:layout_width="wrap_content"
	    android:layout_height="wrap_content"
	    android:text="我的Fragment"/>
	<Button android:layout_width="wrap_content"
	    android:layout_height="wrap_content"
	    android:id="@+id/button"/>

</LinearLayout>
添加MyFragment类,并加载fragment布局:
package com.example.fragment;

import android.app.Fragment;
import android.os.Bundle;
import android.view.LayoutInflater;
import android.view.View;
import android.view.View.OnClickListener;
import android.view.ViewGroup;
import android.widget.Button;
import android.widget.TextView;

public class MyFragment extends Fragment {
	@Override
	public View onCreateView(LayoutInflater inflater, ViewGroup container,
			Bundle savedInstanceState) {
		// layout布局文件转换成View对象
		/**
		 * inflater.inflate(resource, root, attachToRoot)
		 * resource:Fragment需要加载的布局文件
		 * root:加载layout的父ViewGroup
		 * attactToRoot:false,不返回父ViewGroup
		 */
		View view = inflater.inflate(R.layout.fragment, container, false);
		TextView text = (TextView) view.findViewById(R.id.text);
		Button button = (Button) view.findViewById(R.id.button);
		text.setText("静态加载Fragment");
		button.setText("获取内容");
		button.setOnClickListener(new OnClickListener() {

			@Override
			public void onClick(View v) {
				// TODO Auto-generated method stub
				// String value = getAaa();
				// Toast.makeText(getActivity(), "value="+value,
				// Toast.LENGTH_SHORT).show();
			}
		});
		return view;

	}
}
添加jigntai.xml:
<?xml version="1.0" encoding="utf-8"?>
<LinearLayout xmlns:android="http://schemas.android.com/apk/res/android"
    android:layout_width="match_parent"
    android:layout_height="match_parent"
    android:orientation="vertical" >

    <!-- android:id:静态加载必须指定一个ID -->
    <!-- android:name:完整包名 -->
    <fragment
        android:id="@+id/fragment"
        android:layout_width="wrap_content"
        android:layout_height="wrap_content"
        android:name="com.example.fragment.MyFragment"
        />
</LinearLayout>
添加JingTaiActivity类:
public class JingTaiActivity extends Activity {

	private TextView tv;

	@Override
	protected void onCreate(Bundle savedInstanceState) {
		// TODO Auto-generated method stub
		super.onCreate(savedInstanceState);
		setContentView(R.layout.jingtai);

		Button button=(Button) findViewById(R.id.button);
		tv=(TextView) findViewById(R.id.text);
		button.setText("改变");
		button.setOnClickListener(new OnClickListener() {

			@Override
			public void onClick(View v) {
				// TODO Auto-generated method stub
				tv.setText("TextView改变了");
			}
		});
	}
}
主MainActivity中演示静态加载部分添加:
		case R.id.first:
			//演示静态加载
			Intent jingtaiIntent=new Intent(MainActivity.this,JingTaiActivity.class);
			startActivity(jingtaiIntent);
			break;
MainActivity跳转到JingTaiActivity,里面加载了一个,而其中android:name属性是com.example.fragment.MyFragment,在这个MyFragment中又有自己的text、button布局。再回到JingTaiActivity,在其中加载了jingtai.xml,并且可以直接通过findViewById找到MyFragment的布局文件fragment中的text、button。
也就是说,当一个布局文件中通过静态加载Fragment加载到Activity中来,Fragment中的布局文件对Activity也是共享的。