大家好,好久不见,今天要给大家分享的是android aidl的使用。在Android中, 每个应用程序都可以有自己的进程. 在写UI应用的时候, 经常要用到Service. 在不同的进程中, 怎样传递对象呢? 显然, Java中不允许跨进程内存共享. 因此传递对象, 只能把对象拆分成操作系统能理解的简单形式, 以达到跨界对象访问的目的. 在J2EE中,采用RMI的方式, 可以通过序列化传递对象. 在Android中, 则采用AIDL的方式. 理论上AIDL可以传递Bundle,实际上做起来却比较麻烦.
AIDL(AndRoid接口描述语言)是一种借口描述语言; 编译器可以通过aidl文件生成一段代码,通过预先定义的接口达到两个进程内部通信进程的目的. 如果需要在一个Activity中, 访问另一个Service中的某个对象, 需要先将对象转化成AIDL可识别的参数(可能是多个参数), 然后使用AIDL来传递这些参数, 在消息的接收端, 使用这些参数组装成自己需要的对象.
AIDL的IPC的机制和COM或CORBA类似, 是基于接口的,但它是轻量级的。它使用代理类在客户端和实现层间传递值. 如果要使用AIDL, 需要完成2件事情: 1. 引入AIDL的相关类.; 2. 调用aidl产生的class.
今天的两个实例用到两个Android工程,一个是AIDL的服务端另一个是客户端。
服务端的实现步骤:
首先看一下服务端,工程目录如下:
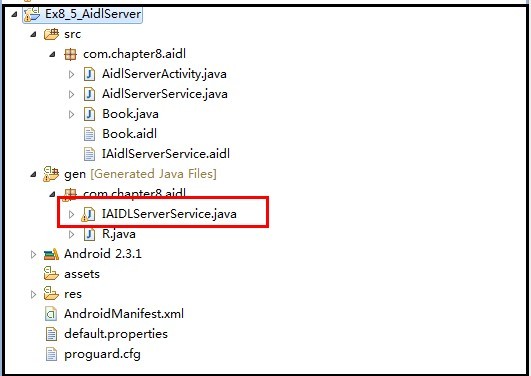
首先创建IaidlServerService.aidl文件,代码如下(一个简单方法,另一个返回对象方法),当我们点击保存时会在gen目录下生成对应的java文件,如上图红色部分:
package com.chapter8.aidl;import com.chapter8.aidl.Book;interface IAIDLServerService { String sayHello(); Book getBook();}
第二步:因为这个接口里有传递对象,所以对象要特殊处理一下,这里继承了Parcelable,Book.java代码如下:
如果大家不明的地方,请参见,下面连接的文章:
Android高手进阶教程(十七)之---Android中Intent传递对象的两种方法(Serializable,Parcelable)!
package com.chapter8.aidl;import android.os.Parcel;import android.os.Parcelable;public class Book implements Parcelable { private String bookName; private int bookPrice; public Book(){ } public Book(Parcel parcel){ bookName = parcel.readString(); bookPrice = parcel.readInt(); } public String getBookName() { return bookName; } public void setBookName(String bookName) { this.bookName = bookName; } public int getBookPrice() { return bookPrice; } public void setBookPrice(int bookPrice) { this.bookPrice = bookPrice; } public int describeContents() { return 0; } public void writeToParcel(Parcel parcel, int flags) { parcel.writeString(bookName); parcel.writeInt(bookPrice); } public static final Parcelable.Creator<Book> CREATOR = new Creator<Book>() { public Book createFromParcel(Parcel source) { return new Book(source); } public Book[] newArray(int size) { return new Book[size]; } };}
第三步:写一个与Book类对应的aidl,命名为Book.aidl,代码非常简单,代码如下:
parcelable Book;
第四步:新建一个名为AidlServerService的Service.代码如下:
package com.chapter8.aidl;import com.chapter8.aidl.IAIDLServerService.Stub;import com.chapter8.aidl.IAIDLServerService;import android.app.Service;import android.content.Intent;import android.os.IBinder;import android.os.RemoteException;public class AidlServerService extends Service { @Override public IBinder onBind(Intent intent) { return mBinder; } /** * 在AIDL文件中定义的接口实现。 */ private IAIDLServerService.Stub mBinder = new Stub() { public String sayHello() throws RemoteException { return "Hello"; } public Book getBook() throws RemoteException { Book mBook = new Book(); mBook.setBookName("Android应用开发"); mBook.setBookPrice(50); return mBook; } };}
第五步:在AndroidManifest.xml注册Service,代码如下:
<?xml version="1.0" encoding="utf-8"?><manifest xmlns:android="http://schemas.android.com/apk/res/android" package="com.chapter8.aidl" android:versionCode="1" android:versionName="1.0"> <application android:icon="@drawable/icon" android:label="@string/app_name"> <activity android:name="AidlServerActivity" android:label="@string/app_name"> <intent-filter> <action android:name="android.intent.action.MAIN" /> <category android:name="android.intent.category.LAUNCHER" /> </intent-filter> </activity> <service android:name="AidlServerService" android:process=":remote"> <intent-filter> <action android:name="com.chapter8.aidl.IAIDLServerService"></action> </intent-filter> </service> </application></manifest>
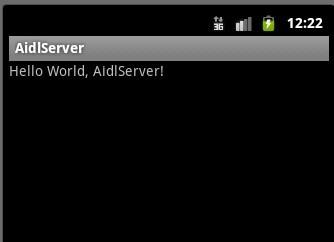
第六步:运行服务端工程,到设备上,好让客户端调用,服务端的Activity什么都没做.效果如下:
客户端的具体实现步骤:
第一步:新建客户端工程,目录结构如下:
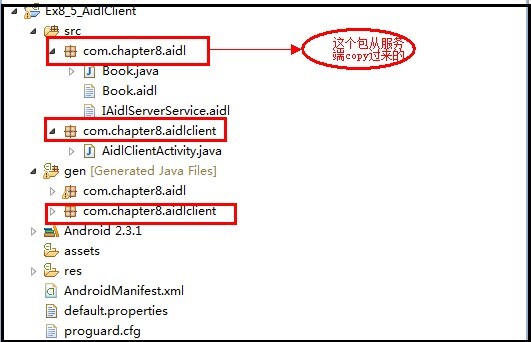
第二步:引入Aidl文件以及用到的类,如上面的com.chapter8.aidl包。直接从服务端里代码copy过来就OK.
第三步:修改main.xml布局文件,增加一个按钮,代码如下:
<?xml version="1.0" encoding="utf-8"?><LinearLayout xmlns:android="http://schemas.android.com/apk/res/android" android:orientation="vertical" android:layout_width="fill_parent" android:layout_height="fill_parent" ><TextView android:id="@+id/textview" android:layout_width="fill_parent" android:layout_height="wrap_content" android:text="@string/hello" /><Button android:id="@+id/button" android:layout_width="fill_parent" android:layout_height="wrap_content" android:text="调用AIDL服务" /></LinearLayout>
第四步:修改AidlClientActivity.java代码如下:
package com.chapter8.aidlclient;import com.chapter8.aidl.IAIDLServerService;import android.app.Activity;import android.content.ComponentName;import android.content.Intent;import android.content.ServiceConnection;import android.os.Bundle;import android.os.IBinder;import android.os.RemoteException;import android.view.View;import android.view.View.OnClickListener;import android.widget.Button;import android.widget.TextView;public class AidlClientActivity extends Activity { private TextView mTextView; private Button mButton; private IAIDLServerService mIaidlServerService = null; private ServiceConnection mConnection = new ServiceConnection() { public void onServiceDisconnected(ComponentName name) { mIaidlServerService = null; } public void onServiceConnected(ComponentName name, IBinder service) { mIaidlServerService = IAIDLServerService.Stub.asInterface(service); //aidl通信 try { String mText = "Say hello: " + mIaidlServerService.sayHello() + "/n"; mText += "书名: " + mIaidlServerService.getBook().getBookName()+"/n"; mText += "价格: " + mIaidlServerService.getBook().getBookPrice(); mTextView.setText(mText); } catch (RemoteException e) { e.printStackTrace(); } } }; @Override public void onCreate(Bundle savedInstanceState) { super.onCreate(savedInstanceState); setContentView(R.layout.main); //初始化控件 mTextView = (TextView)findViewById(R.id.textview); mButton = (Button)findViewById(R.id.button); //增加事件响应 mButton.setOnClickListener(new OnClickListener(){ public void onClick(View v) { //bindService Intent service = new Intent("com.chapter8.aidl.IAIDLServerService"); bindService(service, mConnection,BIND_AUTO_CREATE); } }); } }
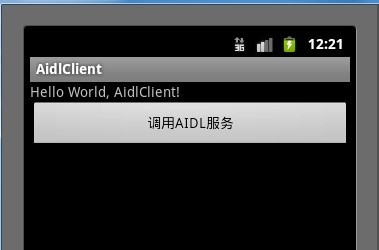
第五步:运行客户端工程,效果如下:
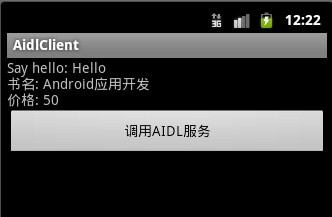
Ok,上面就完整的作了一个Aidl开发的流程,有什么不对的地方希望大家多多指教,今天就讲到这里。谢谢!