李华明Himi 原创,转载务必在明显处注明:
转载自【黑米GameDev街区】 原文链接: http://www.himigame.com/iphone-cocos2d/525.html
上周貌似没有写新的博文,那么今天Himi写个精品的博文奉献给童鞋们;
(不少童鞋说Himi的教程最近都没有源码放出=。 =,这里我解释下,一般我没有放出源码的博文那肯定已经将代码贴出来了,这点是肯定的,否则Himi一定给出源码的)
本篇的知识点如下:
1.两种方式实现自定义精灵;
2.两种方式让精灵利用多帧播放动画
3.为你的精灵设置带有攻击帧的动画,当执行攻击动作的中间会执行扣血等逻辑,然后接着播放动作喔~
首先第一种如何自定义精灵:
两种自定义一个精灵当然无疑我们仍然继承CCSprite,首先看第一种自定义方式,Himi新建一个类,名字是MySprite,代码如下,大家一看就很清晰了;
MySprite.h
//
//  MySprite.h
//  HimiAnimationsTestPro
//
//  Created by 华明 李 on 11-11-20.
//  Copyright (c) 2011年 __MyCompanyName__. All rights reserved.
//

#import "CCSprite.h"

@interface MySprite : CCSprite{

}
+(id) mySpriteInitWithImage:(NSString*)fileName;
-(id) initWithMySpriteImage:(NSString*)fileName;
@end
MySprite.m
//
//  MySprite.m
//  HimiAnimationsTestPro
//
//  Created by 华明 李 on 11-11-20.
//  Copyright (c) 2011年 __MyCompanyName__. All rights reserved.
//

#import "MySprite.h"

@implementation MySprite
+(id) mySpriteInitWithImage:(NSString*)fileName
{
	return [[[self alloc] initWithMySpriteImage:fileName] autorelease];//这里仿照cocos2d原理,自动清理精灵
}

-(id) initWithMySpriteImage:(NSString*)fileName
{
	if ((self = [super initWithFile:fileName]))
	{
        //初始化的东东都写在这里喔~
    }
    return self;
}

-(void) dealloc
{
   //内存清理
    [super dealloc];
}
@end
大家以后自定义精灵的时候可以将我这个当模版即可!如果你不想自定义的精灵传参,那就直接自己修改下构造函数即可,初始化的时候写死名字即可(比如一般游戏主角不需要传入图片名字作为参数,直接在我们主角类的构造中将图片资源名写死即可)
然后我们用第二种方式,所谓第二种方式其实就是修改我们的初始化函数,让其精灵初始化的方式改成帧缓存创建:(适合利用TP打包工具出的图进行来创建精灵)
代码如下:(这里Himi为了让童鞋们看得清楚,Himi新建一个类,名字是MySpriteByFrame)
MySpriteByFrame.h
//
//  MySprite.h
//  HimiAnimationsTestPro
//
//  Created by 华明 李 on 11-11-20.
//  Copyright (c) 2011年 __MyCompanyName__. All rights reserved.
//

#import "CCSprite.h"

@interface MySpriteByFrame : CCSprite{

}
+(id) mySpriteInitWithFrameName:(NSString*)frameName;
-(id) initWithMySpriteFrameName:(NSString*)frameName;
@end
MySpriteByFrame.m
//
//  MySprite.m
//  HimiAnimationsTestPro
//
//  Created by 华明 李 on 11-11-20.
//  Copyright (c) 2011年 __MyCompanyName__. All rights reserved.
//

#import "MySpriteByFrame.h"

@implementation MySpriteByFrame
+(id) mySpriteInitWithFrameName:(NSString*)fileName
{
	return [[[self alloc] initWithMySpriteFrameName:fileName] autorelease];//这里仿照cocos2d原理,自动清理精灵
}

-(id) initWithMySpriteFrameName:(NSString*)fileName
{
	if ((self = [super initWithSpriteFrameName:fileName]))
	{
        //初始化的东东都写在这里喔~
    }
    return self;
}

-(void) dealloc
{
    //内存清理
    [super dealloc];
}
@end
大家注意两种自定义精灵.m类中的 if((self = XXX)这里是重要的区别,一个是直接索引资源名称,一个是通过名称找到帧缓存中的帧;
OK,两种创建的方式的自定义精灵都完成了,下面我们来尝试创建吧:
        //---------创建一个我们自定义的MySprite精灵吧(利用文件名直接创建)
        //1.import 自定义类.h (#import "MySprite.h")
        MySprite*mySprite=[MySprite mySpriteInitWithImage:@"Icon.png"];
        mySprite.position=ccp(70,size.height*0.5);
        [self addChild:mySprite];


        //---------创建一个我们自定义的MySpriteByFrame精灵吧(利用帧缓存中的文件名创建)
        //@@@@注意因为是从帧缓存里找到对应名字的帧,那么肯定需要将用到的帧放在缓存里。
        [[CCSpriteFrameCache sharedSpriteFrameCache]addSpriteFramesWithFile:@"mySpriteFrames-hd.plist"];
        MySpriteByFrame *mySpriteByF =[MySpriteByFrame mySpriteInitWithFrameName:@"himi.png"];
        mySpriteByF.position=ccp(300,size.height*0.5);
        [self addChild:mySpriteByF];
注意:利用帧来创建的时候必须要将使用的帧首先加载到帧缓存中,这里Himi利用TP打包工具将一张名字为himi.png的图打包到mySpriteFrames-hd.plist中了,也就是下面这句代码将himi.png图加载到帧缓存中了,否则报错找不到喔;
[[CCSpriteFrameCache sharedSpriteFrameCache]addSpriteFramesWithFile:@"mySpriteFrames-hd.plist"];
加载的图片资源图如下:
注意这里的-hd 文件和非-hd的文件的区别,不太懂的童鞋请移步到这篇博文:
【iOS-Cocos2d游戏开发之九】讲解CCSpriteBatchNode与TP工具的".pvr.ccz",".plist"共用的终极精灵优化及注意事项!
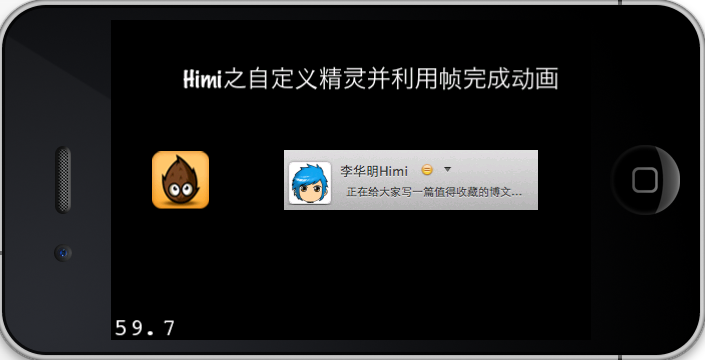
运行截图如下:
下面Himi来介绍第二个知识点:两种方式让精灵利用多帧播放动画
Himi这里就不细说了,直接提供给大家Himi封装好的两个方法:(Himi使用的cocos2d-iphone版本是1.0.0)
先唠叨一句,刚才上面说过了,创建精灵一种是利用直接索引文件名字来创建,另外一种就是直接利用帧缓存来创建,那么让一个精灵实现动画的播放当然也一样对应分为两种方式;直接上代码:**
CCAnimationHelper.h
//
//  CCAnimationHelper.h
//  SpriteProject
//
//  Created by Himi on 11-8-6.
//  Copyright 2011 __MyCompanyName__. All rights reserved.
//

#import "cocos2d.h"

@interface CCAnimation (Helper)
//直接索引图片名称
+(CCAnimation*) animationWithFile:(NSString*)name frameCount:(int)frameCount delay:(float)delay;
//利用帧缓存中的帧名称
+(CCAnimation*) animationWithFrame:(NSString*)frame frameCount:(int)frameCount delay:(float)delay;
@end
CCAnimationHelper.m
//  CCAnimationHelper.m
//  SpriteProject
//
//  Created by Himi

#import "CCAnimationHelper.h"

@implementation CCAnimation (Helper)
//直接索引图片名称
+(CCAnimation*) animationWithFile:(NSString*)name frameCount:(int)frameCount delay:(float)delay
{
	NSMutableArray* frames = [NSMutableArray arrayWithCapacity:frameCount];
    NSString* file;
	for (int i = 0; i < frameCount; i++)
	{
        file =nil;
		file = [NSString stringWithFormat:@"%@%i.png", name, i];
		CCTexture2D* texture = [[CCTextureCache sharedTextureCache] addImage:file];
		CGSize texSize = texture.contentSize;
		CGRect texRect = CGRectMake(0, 0, texSize.width, texSize.height);
		CCSpriteFrame* frame = [CCSpriteFrame frameWithTexture:texture rect:texRect];

		[frames addObject:frame];
	}
    return  [CCAnimation animationWithFrames:frames delay:delay];
}
//利用帧缓存中的帧名称
+(CCAnimation*) animationWithFrame:(NSString*)frame frameCount:(int)frameCount delay:(float)delay
{
	NSMutableArray* frames = [NSMutableArray arrayWithCapacity:frameCount];
    NSString* file;

	for (int i = 1; i <= frameCount; i++)
	{
        file =nil;
		file = [NSString stringWithFormat:@"%@%i.png", frame, i];
		CCSpriteFrameCache* frameCache = [CCSpriteFrameCache sharedSpriteFrameCache];
		CCSpriteFrame* frame = [frameCache spriteFrameByName:file];
		[frames addObject:frame];
	}
	return  [CCAnimation animationWithFrames:frames delay:delay];
}
@end
+(CCAnimation*) animationWithFile:(NSString*)name frameCount:(int)frameCount delay:(float)delay{};
//参数讲解:name:资源文件名  ;frameCount 总帧数   ;   delay :每一帧的刷新时间
+(CCAnimation*) animationWithFrame:(NSString*)frame frameCount:(int)frameCount delay:(float)delay{};
//参数讲解:frame:帧文件名  ;frameCount 总帧数   ;   delay :每一帧的刷新时间
注意:
1、类有(help)的表示对原有的类进行扩展;
2、动作帧都要按照himi0.png,himi1.png,himi2.png,这样子命名,当然拉你不想这样可以修改这两个方法即可;
3.注意Himi这里的两个方法,一个是从0开始喔,另外一个是从1开始的,如果你用帧缓存进行创建动作就要从himi1.png,开始命名,嘿嘿~**
下面是使用方法:
        //--@@@@@@@--第二个知识点--@@@@@@@


        //利用文件名创建动作
        //--首先导入#import "CCAnimationHelper.h"
        MySprite*mySprite=[MySprite mySpriteInitWithImage:@"himi0.png"];
        mySprite.position=ccp(140,mySprite.contentSize.height*0.5);
        [self addChild:mySprite];

        CCAnimation*anim=[CCAnimation animationWithFile:@"himi" frameCount:12 delay:0.1];
        CCAnimate* animate = [CCAnimate actionWithAnimation:anim];
        CCSequence *seq = [CCSequence actions:animate,nil];
        CCRepeatForever* repeat = [CCRepeatForever actionWithAction:seq];
        [mySprite runAction:repeat];


        //利用帧缓存中的文件名创建动作
        //--首先导入#import "CCAnimationHelper.h"
        [[CCSpriteFrameCache sharedSpriteFrameCache]addSpriteFramesWithFile:@"animationsFrames.plist"];
        MySpriteByFrame *mySpriteByF =[MySpriteByFrame mySpriteInitWithFrameName:@"himi1.png"];
        mySpriteByF.position=ccp(350,size.height*0.5);
        [self addChild:mySpriteByF];

        anim=[CCAnimation animationWithFrame:@"himi" frameCount:12 delay:0.1];
        animate = [CCAnimate actionWithAnimation:anim];
        seq = [CCSequence actions:animate,nil];
        repeat = [CCRepeatForever actionWithAction:seq];
        [mySpriteByF runAction:repeat];
这里要提醒童鞋们的有两点:
1.利用帧缓存创建动画的时候要注意要提前将帧加载到缓存里喔~
2.Himi这两个方法没有写一样,所以动作帧的命名一个从0开始,另外一个从1开始!童鞋们可以自行改过来哈
运行截图如下:
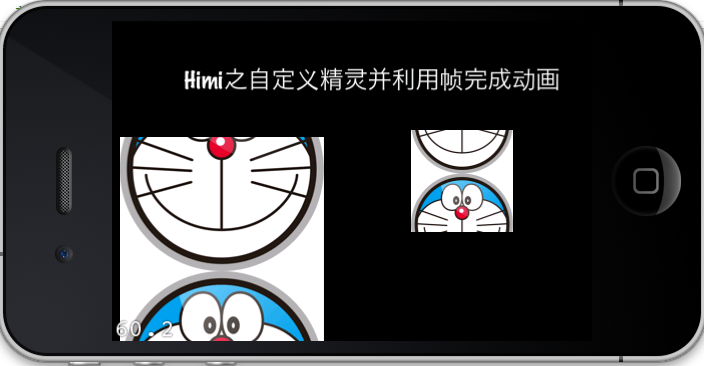
【扯皮一下,如果你在我的Android或者iOS群中,你感觉这张哆啦A梦图熟悉不~嘿嘿,Himi的7个群都是这个GIF做为群头像,娃哈哈,我自己做的 娃哈哈;】
第三点知识点:为你的精灵设置攻击帧;
首先跟一些童鞋简单说下何谓攻击帧,假如主角攻击一个怪物的时候,肯定播放攻击动作,但是!你是在攻击动作开始的时候就扣怪物血还是攻击动作结束后扣怪物血呢?都不是!!!因为很不真实!所以我们应该当攻击动作播放到设定的某一帧的时候进行扣怪物血或者其他逻辑,然后继续播放剩下的攻击动作,这样才更加的真实!
那么OK,这里Himi仍然封装成一个方法让你直接使用即可;首先看下代码:
//带有攻击帧的动画
+(CCAnimation*) animationWithFrameFromStartFrameIndex:(NSString*)frame startFrameCountIndex:(int)startFrameIndex frameCount:(int)frameCount delay:(float)delay
{
	NSMutableArray* frames = [NSMutableArray arrayWithCapacity:frameCount];
    NSString* file;
    file =nil;
	for (int i = startFrameIndex; i < frameCount+startFrameIndex; i++)
	{

		file = [NSString stringWithFormat:@"%@%i.png", frame, i];
		CCSpriteFrameCache* frameCache = [CCSpriteFrameCache sharedSpriteFrameCache];
		CCSpriteFrame* frame = [frameCache spriteFrameByName:file];
		[frames addObject:frame];
	}
	return  [CCAnimation animationWithFrames:frames delay:delay];
}
    +(CCAnimation*) animationWithFrameFromStartFrameIndex:(NSString*)frame startFrameCountIndex:(int)startFrameIndex frameCount:(int)frameCount delay:(float)delay  {}
    //参数介绍:frame :帧名字;     startFrameIndex:指定播放起始帧 ;   frameCount:帧总数   ; delay:每帧的刷新时间
使用方法如下:
//--@@@@@@@--第三个知识点--@@@@@@@
[[CCSpriteFrameCache sharedSpriteFrameCache]addSpriteFramesWithFile:@"animationsFrames.plist"];
MySpriteByFrame *mySpriteAni =[MySpriteByFrame mySpriteInitWithFrameName:@"himi1.png"];
mySpriteAni.position=ccp(260,size.height*0.5);
[self addChild:mySpriteAni];
//首先执行前6帧动画
CCAnimation*anim=[CCAnimation animationWithFrameFromStartFrameIndex:@"himi" startFrameCountIndex:1 frameCount:6 delay:0.1];
CCAnimate* animate = [CCAnimate actionWithAnimation:anim];
//攻击帧执行的函数
CCCallFunc *downEnemyHp =[CCCallFunc actionWithTarget:self selector:@selector(downEnemyHp)];
//后6帧动画
anim=[CCAnimation animationWithFrameFromStartFrameIndex:@"himi" startFrameCountIndex:7 frameCount:6 delay:0.1 ];
CCAnimate* animateForAttackIndex = [CCAnimate actionWithAnimation:anim];
CCSequence *seq = [CCSequence actions:animate,downEnemyHp,animateForAttackIndex,nil];
[mySpriteAni runAction:seq];
---------回调函数
-(void)downEnemyHp{
CCLabelTTF *label = (CCLabelTTF*)[self getChildByTag:99];
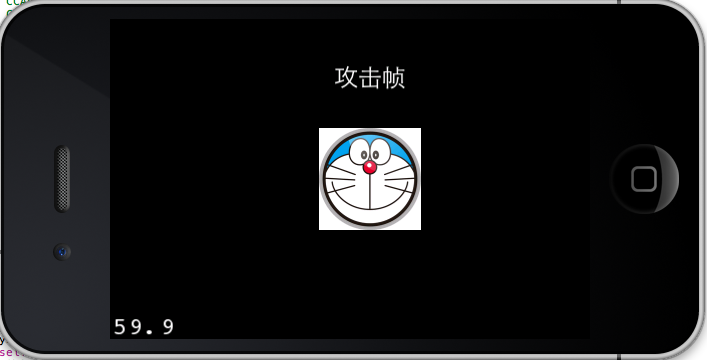
[label setString:@"攻击帧"];
}
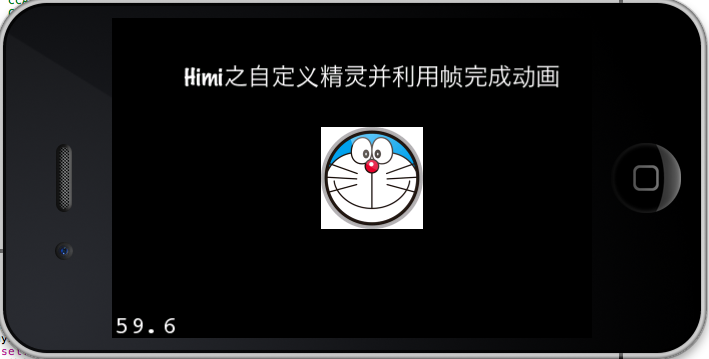
前六帧-》回调downEnemyHp函数-》继续播放剩下的播放帧数
运行截图如下:
OK,继续忙了~由于本文知识点较多和较细节,这里Himi放出源码,我的动作相关的封装都在CCAnimationHelper.h/.m中喔,注意不要改类名,因为这个类是Himi对cocos2d源码进行的扩展!**